Monday, February 28, 2011

Taking the airbrush to the cleaner...

Even through I 'm a NOOB in the world of airbrushing I do know one thing - A filthy airbrush is the shortcut to a poor finish. So a word of advice to all, keep the gun clean at all times. This is in fact as easy as it sounds, if one is prepared for the task that is... Allow me to share the shortcuts I have come across while working with the airbrush.

This is what I do to ensure that the gun is operational at all times:

Before a spraying session:
·        Prepare a bucket of water for cleaning and a jar of water for brushes (the hairy ones).
·        Check needle on airbrush to ensure that it is completely clean.
·        Functional check of gun and compressor to see that air / paint flow is ok

During a spraying session (when changing colours):
·        First fill the cup with water, and use a brush to clean the cup.
·        Submerge the tip of the airbrush and cup in the bucket of water and spray for a short while, to blow the remaining paint from the cup/nozzle.
·        Put some drops of washer (the freeze resistant version from your car) into the cup and spray until cup is empty. NB! Make sure that you spray into a cleaning station as the alcohol in the washer is not something you want to inhale.

After a spraying session:
·        Repeat the steps from the colour changing above.
·        Remove needle and dry it.
·        Check the cup and gun for remaining paint and dry that.
·        I end the session by spraying some drops of Vallejo airbrush cleaner through the gun and then drying the needle again.

Safety considerations:
·        Inhaling stuff like paint, washer and airbrush cleaner is unlikely to be good for your health, so I suggest that you use some kind of respirator with a filter.
·        Further to that I’ve started to use a homemade cleaning station to catch some of the spray before it spreads to the entire house. You could buy one from the airbrush vendor, but any semitransparent container with a lid will do – Mine is a cotton stick container with a hole (made with a hobby knife) in the lid.


/Nicolai aka Atoom

UPDATED 01032011

I bought a ultrasonic cleaner, that works wonders on the tiny dirt inside the airbrush - Must have if you can afford it.

Bakeoff sandbag modelling

I’ve recently started looking for additional heavy weapons for the Catachans, and this time I’m going for some mortars. In my mind mortar emplacements are well prepared and dug in, so in this case I want some sand bag barriers.

Modelling sand bags is quite easy, and using a very simple approach you can get the cloth texture on the sand bags for ‘free’. I used FIMO modelling clay for this, as it is cheap and doesn’t stick to other surfaces like Green Stuff.

Making aand baking sand bag is easy:
  1. Cut a piece of FIMO in appropriate size.
  2. Shape it using a piece of cloth – That’ll leave the cloth texture in the clay.
  3. Bake it, and make sure to make a lot, a sand bag wall takes quite a few bags.
  4. Build the wall, using the biggest bags for the base and the smaller ones for the top.

Some pictures of the result:


NB! This wall hasn’t been glued, but I’m going to use PVA glue mixed with sand for gluing the bags together.

/Nicolai aka Aoom

Saturday, February 26, 2011

Playing with the airbrush - Light and shade I...

I've been playing with the airbrush, looking for light and shade, the easy way…

I have 2 squads of storm troopers that are to be painted at some point - 20 man strong is not something I favour, especially because I have just painted 10 of them for the tournament I just attended...

So, I was looking for the cheap and fast way around that, and that was the aim for the session - Define light and shade, using the airbrush. Starting from a black undercoat, I figured that I could use white to define light on raised areas and let the black undercoat define the shades. Below picture shows two test subjects, with different amounts of white 'lighting'.


Using an airbrush you live and die baced on the quality and colour of the 'canvas' you are spraying - The test subjects had a poor quality foundation spray, and mould lines that the airbrush made even more obvious... So I need to spend more time on prepping the lot before scaling the experiment to the lot of the storm troopers. That aside I started applying the 'real' colour for the troopers. In this case a dark green, and you can see the test subjects are now 3, as I sprayed one additional directly on top of the black primer.


Do I like the result?? Well, test subject 1 is too bright and subject 3 is too dark, so the conclusion is that I need to be very careful when using white as lighting the model, or spray the modes with a coat of black wash. Below is a picture of the 3 test subjects and one of the troopers from the squad that I painted using ordinary brushes.


Quick recap:
1.      Black undercoat.
2.      White lighting, sprayed from above 90-45 degree angle targeting the head and shoulders.
3.      Colour the model with camo green to set the tone – Alternatively I have seen people use inks to colour the areas, something that I’ll explore another time.

Finally on a side note, I continue to be amazed by the work you can do in no time - See this, where I used a plastic cup and some paper as stencils and two colours to make, what could have been a nice canvas for freehanded banner or rhino-door - if it hadn't been on paper :o)


/Nicolai aka Atoom


Friday, February 25, 2011

Incoming: Tomb Kings!

Recently Games Workshop announced that the Tomb Kings are going to be released in a new version this May. This has caught my attention as I've always had a weak spot for the undead of Warhammer Fantasy Battle. I have a entire army of Tomb Kings tucked away in my collection, and have always enjoyed the minis from the TK range.

One of my favourites - the one I'll display here today - is the casket of souls. Not only being a massive model, of the purest white metal, with loads of details and a crisp base covered by the bones of the unfortunate souls of the Nehekharan desert. My wife bought this model for me many years ago - Asking the redshirt in GW for the undead model that was hardest to paint! I entered it in an online painting contest and won - Oh joy, the hours went fast and in high numbers into this model...


/Nicolai aka Atoom


Thursday, February 24, 2011

Display Cabinet - The Duke

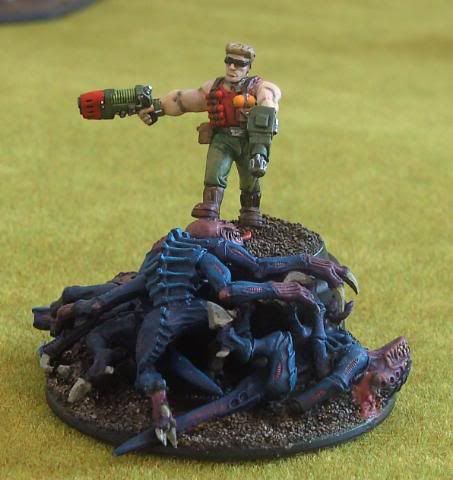
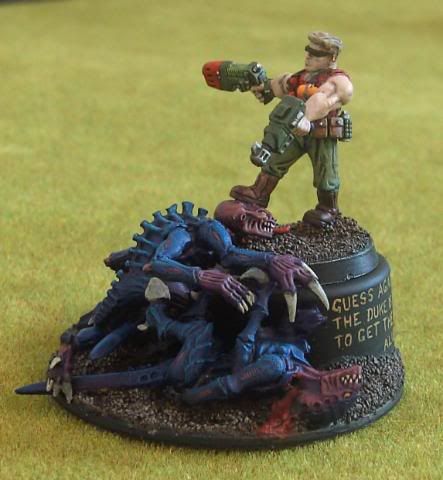
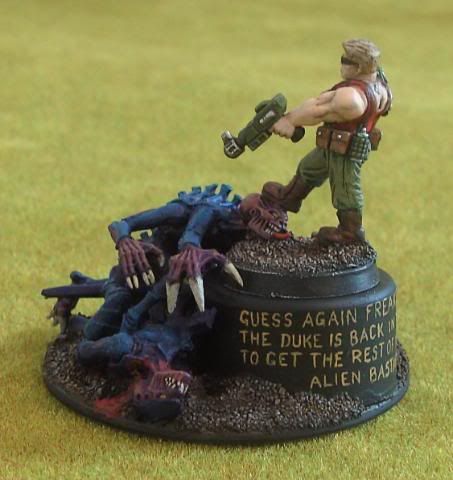
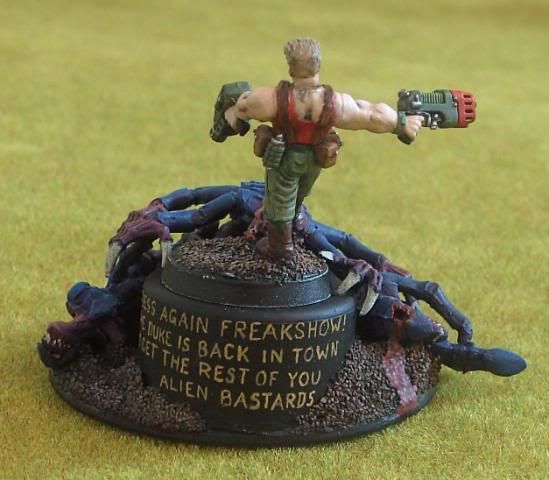
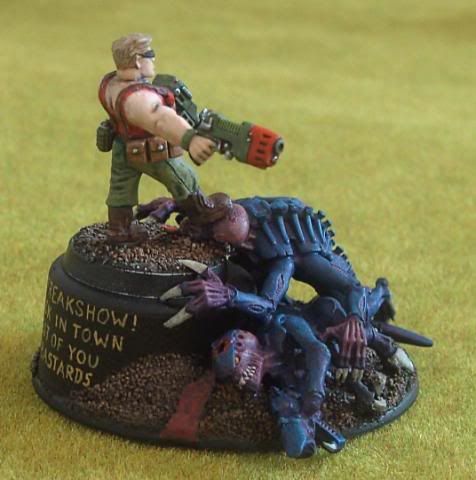
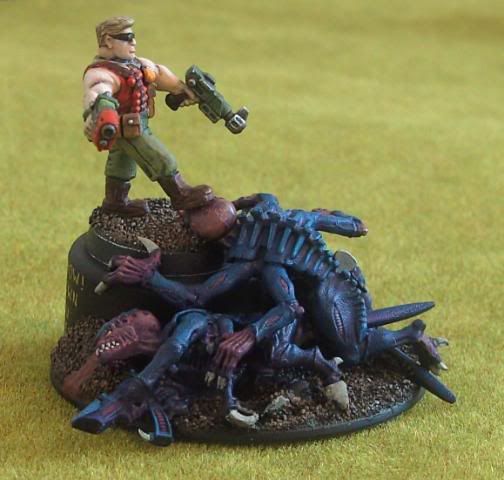
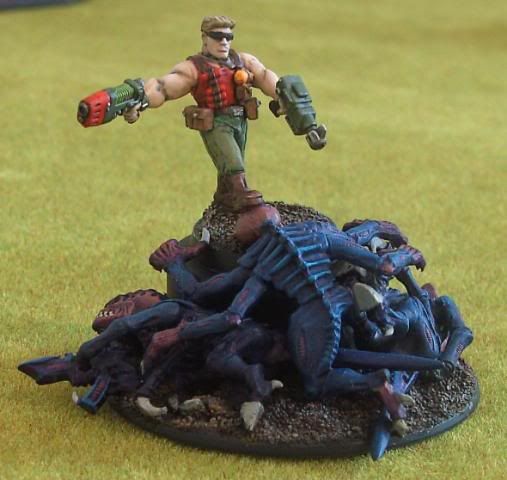
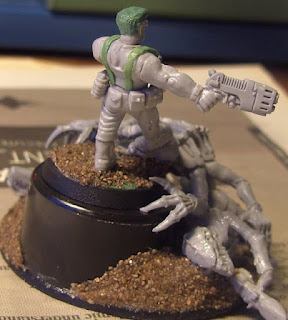
One of the minis in my Catachan army that received a lot of attention on the tournament I recently attended was my remake of the Duke aka Duke Nuke ‘Em. As a response to that, I have looked at my collection of pictures, and found those that shows how the display base and the duke was modeled.

The inspiration:

Modeling the display base:
I wanted a min that could be used for gaming, so I made a base resting on top of the display base. It just turned out that the claw of the Genestealer was just perfect to make the base stick to the display stand…


Modelling the Duke:
Catachan troopers wear sun-glasses, so that made the selection of the head easy, all I had to do was to add a flat-top hair-cut using greenstuff. The bandoliers is modeled using bits from the Space Marine Scout Bikers + greenstuff.

Painting the display base:

The Duke completed:

/Nicolai aka Atoom

Wednesday, February 23, 2011

Returning from a weekend of war…

I’m back from the tournament and what an experience! Cool people, and lots of w40k. I really has a blast, and even made 2 victories and some extremely close losses. I have added some pictures and notes from the tournament for those interrested

Game 1 Best of three vs. CSM Iron Warriors (IW) – WIN!
Mission Overview: Your forces and the enemy are attempting to capture and hold 3 important
objectives. The player that controls the most objectives at the end of the game wins the battle.


Notable Moments:
Turn 1: Managed to seize the initiative, and the shooting that followed that made a dent in the IW amour, destroying a Rhino, immobilizing a Predator, shaking a Basilisk and a Vindicator limiting the amount of enemy fire in turn 1.
Turn 2: IW holds all objectives and IW fire takes out majority of IG transporters.
Turn 3: Chaos sorcerer kills entire squad of Storm Troopers.
Turn 4: Arrival of the Veteran squad in the Valkyrie, allowing them to spray the enemy Terminators with plasma – Killing the entire unit. That marked the turn of the game, until then the IW had all objectives.
Turn 5: Random game length roll, game didn’t end, resulting in IG victory as the additional turn allowed me to seize two of the 3 objectives.

Game 2 Reversed Ambush vs. Eldar – LOSS!
Mission overview (defender): Your forces have been holed into a defensive position by an aggressive enemy war-host closing in for the kill! Luckily, you have managed to shroud your retreat by filling the air with thick, noxious fumes from the city’s old smoke vents. You must hold your ground until your reinforcements arrive to perform a surprise attack on your cocky enemies…

Notable Moments:
None – It was a slaughter, and unfortunately it was my guys who was on the receiving end!

Game 3 The Riggers vs. Blood Angels – LOSS!
Mission overview (defender): You are in control of a vital power plant but is under attack! Repel the intruders with massive firepower and surgical counterstrikes to defend the three small power stations from being rigged by enemy troops. Most importantly, you must not allow the main power converter to be destroyed by the enemy. Defend it at all costs.


Notable Moments:
Turn 5: Blood Angels assault terminators move in on the main objective, starting a huge close combat fight lasting for two rounds. Terminators  are swarmed by infantry including my company command squad. 4 terminators are killed 20+ guards loose their lives.
Turn 6: One terminator remains, company commander scores one wound with his power weapon, forcing a storm shield INV save (4+) – If it was failed then I would have won, unfortunately the save was made… In other words it all came down to one roll 50-50!

Game 4 Frontal Surge vs. Tau – WIN!
Mission overview: The location of the frontline may turn the tides for both engaging armies of this massive battle. Therefore it is crucial to your campaign that you hold your enemy at bay and surge forwards to win land. The objective of this mission is to control as many of the bands on the game board as possible. Each band represents a certain points value to each player.

Notable Moments:
None – The game started with a shootout, where Tau was quickly decimated, primarily due to unacceptable dice rolls from my opponent.


Game 5 Decoy vs. Speedy Orks – LOSS!
Mission overview (Attacker): A transport vessel carrying important data has been shot down by the enemy. The stasis chests onboard the vessel are now scattered across a large area. Use your scanners to locate the right stasis chest and secure the important data before it falls into enemy hands! The attacker must control the primary mission objective at the end of the game in order to win. If the attacker does not control the Counter the defender wins.

Notable Moments:
Turn 0: I was nominated attacker! This caught both me and my opponent flatfooted, but really made a difference for the game.
Turn 1: My shooting made a big impact on his line, destroying an deffrolla-battlewaggon, a truck and shaking some buggies.
Turn 3: Veterans in Valkyrie and storm troopers arrive from reserve and stops the orks from advancing.
Turn 5: I manage to screen the objective, and pick it up with an infantry squad.
Turn 6: The infantry squad carrying the objective runs through a wood – I assumed that victory is mine, but no! One truck remains speeding forward, unloading the orks inside. They have to make a 5” charge through the wood, to get to the squad carrying the objective. 2D6 for difficult terrain is rolled – He makes the charge & bye-bye objective.

/Nicolai aka Atoom

Monday, February 21, 2011

Making Cool Banners - Colouring Book style

Freehand can be a though nut to crack, especially if you (like me) have limited drawing skills, but that is exactly where this little tutorial comes in handy. A while back I decided to make myself a banner guy for my Catachan army, as the one in the command Squad set from Games Workshop wasn't to my liking...

Finding the pictures:
The internet is a great source for finding materials for your banners, and that was where I started. Google's picture search is a good tool for finding that little jewel that will make yor banner just right, and I admit to spending hours looking for exactly the right image...

Drafting your banner:
Once you have your image, then you need to start mocking up banners, until you find the style you like. I used PowerPoint from Microsoft, but I'm sure that other applications with similar functionality will do just fine. The important thing is that you can set the outline of the banner to the millimetre.

In PowerPoint I did the following: First I drew some rectangles of suitable sizes. The easiest way of getting them just right is to measure the maximum dimensions possible on the banner pole, and then use that as guide when setting dimensions on the box that is going to outline the banner. In PowerPoint that is easily done by right clicking the rectangle and selecting 'Format Auto shape' - then the size can be set using the size tab. You can see some mockups I did below, all are done with pictures from the net + autoshapes and word art from PowerPoint

Once you're happy, then push print - I recommend that you print monochrome (black/white) on a laser printer, as ink prints are not suitable for painting on. Another thing that might give you an edge is to print on heavy paper (100g/m2), I didn't, but I wish I had as the paper I used (80g/m2) was wrinkling a bit from the moisture of the paint.

Painting your banner:
Bring out the paints - I used the colours from Games Workshop, any other paints will do (including airbrush). The all important thing is that you thin the paints down, as you need the monochrome definition in the print to guide you, and undiluted paints will cover then in a second. The techniques for painting the Colour Book style banner is the same as you use for your minis - Light colours for the 'raised' areas on the banner and dark colours for the shaded areas - All that is something that you get for free as the monochrome print will tell you to paint those colours. White = Light colours, Black = Shade & Grey = the level of blending in between. Below is a couple of examples of banners where I have been painting some of the print.

Modelling the banner:
Now you have a paper banner, but we all know that life expectancy of those is unacceptable, so it needs to be stuck to something. I used the thin from a Mayonnaise Tube, because it is cheap, easily available and modelling can be done using a pair of household scissors. Water down some PVA glue (PVA 75:25 water) and apply that to the tin, then place the painted banner on top. Wait for it to dry, and cut it into shape using the scissors. One last thing - Remember to wrinkle the banner a bit - I forgot that and you can see on below pictures what kind of difference it makes.


/Nicolai aka Atoom
Saturday, February 19, 2011

Off to war! My 1st Tournament...

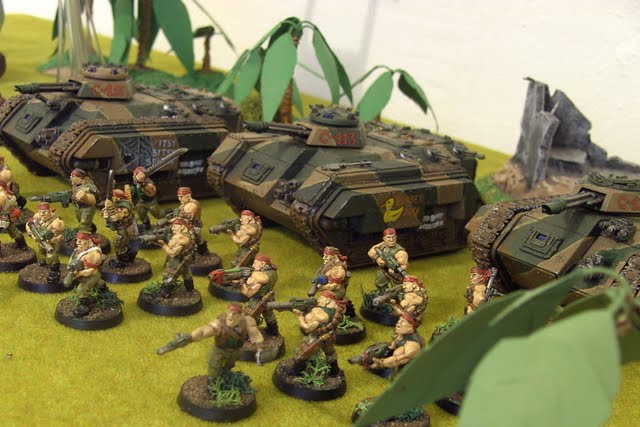
This weekend I'm off to war! I’ll be taking my Catachan IG army head to head with other players in a tournament. Despite having been in the hobby for more than 20 years I have never attended a tournament, so I'm very excited about the experience. The tournament I'm going to is the Emperor's Chosen XI, one of the bigger 40k events in Denmark - The ticket was a surprise from my wife!

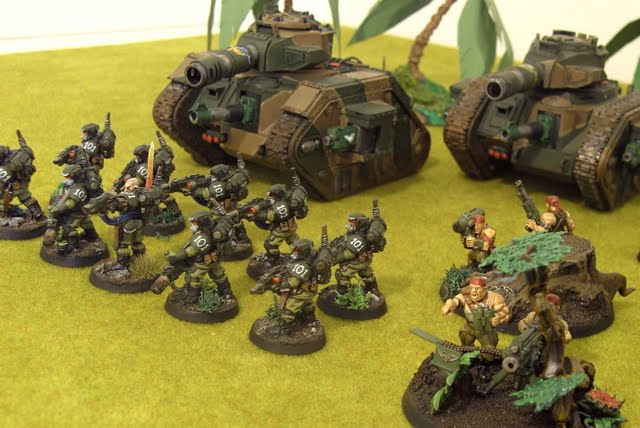
Last couple of months have been spend on finalising the Catachan XI - But now they're all dressed up for some action :o). The pictures here were taken a couple of days back when I was doing a roll call to make sure that everybody was present and accounted for...

It is a 1600 point tournament with army selection restrictions (S3), and you can see the list I'm bringing below:

HQ:
Company Command Squad (5#, 85 pts)
  Company Commander (Power Weapon & Plasma Pistol)
  Company Command Squad (CC Weapon, Laspistol & Regimental Standard)

Troops:
Infantry Platoon (64#, 725 pts)
Platoon Command Squad
  Platoon Commander (Laspistol, Plasma Pistol)
  Platoon Command Squad (Lasgun & Heavy Weapons Team – Lascannon)
Infantry Squad 1:
  Sergeant (Laspistol & CC Weapon)
  Infantry Squad (Lasgun & , Heavy Weapons Team – Lascannon)
Infantry Squad 2:
  Sergeant (Laspistol & CC Weapon)
  Infantry Squad (Lasgun & , Heavy Weapons Team – Lascannon)
Infantry Squad 3:
  Sergeant (Laspistol & CC Weapon)
  Infantry Squad (Lasgun & Plasmagun)
  Chimera (Turret Multi-Laser, Heavy Bolter)
Infantry Squad 4:
  Sergeant (Laspistol & CC Weapon)
  Infantry Squad (Lasgun & Plasmagun)
  Chimera (Turret Multi-Laser, Heavy Bolter)
Infantry Squad 5:
  Sergeant (Laspistol & CC Weapon)
  Infantry Squad (Lasgun & Plasmagun)
  Chimera (Turret Multi-Laser, Heavy Bolter)
Heavy Weapons Squad 1:
  Heavy Weapons Teams (Lasgun & Heavy Bolter)
Heavy Weapons Squad 2:
  Heavy Weapons Teams (Lasgun & Missile Launcher)

Veteran Squad (10#, 125 pts)
   Veteran Squad @ 125 pts (Lasgun & Plasmagun x3)
   Veteran Sergeant (CC Weapon & Plasma Pistol)

Fast Attack:
Valkyrie Assault Carrier Squadron (1#, 100 pts)
  Valkyrie (Multilaser; Hellstrike Missiles x2)

Heavy Support:
Leman Russ Squadron (2#, 370 pts)
  2 Leman Russ Battle Tank (Battle Cannon; Lascannon; Heavy Bolter Sponsons)

Elite:
Storm Trooper Squad (10#, 195 pts)
   9 Storm Trooper Squad @ 195 pts (Hot-shot Lasgun &  Meltagun x2)
      1 Storm Trooper Sergeant (Hot-shot Laspistol & Power Weapon)

Now lets look at the army itself:


/Nicolai aka Atoom