Showing posts with label Playing. Show all posts

Thursday, June 13, 2013

Dawn of the Apocalypse

 
All Things Zombie Battlereport


Dawnhammer - Left to right: Lizard, Dave, Jake & Axel
Situation: The band DawnHammer is on tour in southern Europe. They are promoting their latest release “Dawn of the Apocalypse”. They played their opening concert at the INFERNO, and went to the nearest flea-bag motel afterwards.

Next morning (aka day zero):

Screaming tires and a loud crash wake the band DawnHammer – One minute later their manager Seth calls them. “Guys something is seriously wrong – I’m at the INFERNO, it sounds like the party us out of hand people are screaming and…” Phone is disconnected. “Something is not right here, we better go check it out – Seth sounds like he is in trouble.” Says Dave the lead singer, as he reaches into the go-bag and pulls out a Mac-10 machine pistol…


SCENARIO:

The band wakes up in the motel in the other area of town. They need to cross the town in order to reach the INFERNO in order to rescue Seth their manager. Seth has the keys to the tour bus, parked next to the INFERNO - The bus must be secured, as it contains several resources like junk food, merchadice and booze, resources that are critical to the survival of the band and their promotion tour.

There is a Possible Enemy Force (PEF) is moving in the hills behind the Gaslight Bar & Grill, something that the band is unaware of. If the PEF comes in sight of Seth, then he will call them to warn them about the PEF.


Turn 1:

Upset by the phonecall from Seth and busy distributing weapons from the go-bag the band does nothing. The loud crash that awoke the band caught the attention of the PEF, that moves forward in cover of the Pawn shop.

Turn 2:

The PEF continues forward to the source of the loud sound – It is a taxi that has crashed into some palms next to the road. DawnHammer leaves the motel room and starts moving towards the main road. Phone rings just in time to warn Dave that Seth has seen some suspicious looking people down the road.

Turn 3:

Seth tells the band that the PEF is moving into position just behind the motel. This makes the band take up positions waiting the PEF to make contact.
 

Turn 4:

The PEF turns the corner of the motel, and the band sees that it is two civilians – A cameraman and a reporter from local news media. Seeing that the band is armed to the teeth the media crew immediately sees a scoop and decides to join the band. The newcomers tells about a strange sight by the crashed taxi, where 3 men was killing the injured driver and the passenger.
 

Turn 5:

The band decides to move in cover of the woods, hoping that the woods will shield them from sight of those assaulting the taxi. Unfortunately, the move was not a success, as the group of zeds by the taxi sees them.

Turn 6:

Phone rings – It is Seth calling to tell the band that he cannot find the keys to the tour bus. Band decides to confront the men from the assault on the taxi. All band members realize that something is seriously wrong with the people approaching. Jake and Lizard has the guts to open fire. Air fills with shots from a machine pistol and a pistol – As the smoke clears all three men lies dead on the ground. “WTF! That was zombies!” Cameraman Eric shouts, “Look out! two more in the taxi”
 

Turn 7:

“Where is Dave?!” Confusion spreads as the Dawnhammer realizes that their lead singer seems to have disappeared.

Turn 8:

The two zombies from the taxi charges Jake, who is rooted to the spot, fearing for his life. The two zombies quickly overpower him and knocks him the ground.

Turn 9:

The band members rush in to save Jake, who seems to be out of the fight. A well placed burst from Lizards’ machine pistol kills one of the zeds and knocks the other one down. The cameraman Eric rush in, and kicks the downed zed, but unfortunately this seems to have little effect.

Turn 10:

Lead singer Dave returns, holding his cell phone: “Seth just called, there is a large group that has just left the INFERNO!” Newsreporter Julie points north: “they are not alone, I see two more groups – We need to move!” Axel picks up Jake and the groups starts to move. Cameraman Eric pulls out a gun and shoots the downed zed in the head. Sound of sirens are heard closing – The police are approaching in order to investigate the shooting
 

Turn 11:

Police arrives next to the motel, drawing all the attention of the advancing Zeds. One group of Zeds charge the policecar. Two Zeds are crushed under the police car, the last one is knocked to the ground. The band decides to make a break for it.
 

Turn 12:

Zeds move in on the policecar, forcing the officers to attempt to outmaneuver the group directly in front of their car. They succeed in the maneuver, crushing a zombie under the tires. Seth sees the police car, and dials 911, hoping to be rescued by the officers. The noise from the policecar seems to have attracted 3 zeds from the Atomic Liquor Store.
 

Turn 13:

The Band makes a run for it, running for cover behind the Pawn shop.

Turn 14:

Police car stops and 2 cops step out opening fire on the zombies in front of the Liquor store, killing one zombie and knocking the other two over. The shooting and noise from their car attracts another two Zeds behind the Gaslight Bar & Grill.
 

Turn 15:

Dave fires at the newly arrived Zeds, trying to cover the other two band members carrying Jake. Killing one, but the sound attracts another zombie just behind the police officers, who turns and fires at the zombie, killing it. All the noise from the gunfire attracts additional 3 zeds close to Dave and the media crew.

Turn 16:

Dave and the media crew opens fire – Combined pistol and machine pistol fire kills one zombie, and knocking two over, but the noise just attracts additional Zeds. So the band starts to move for the bus.
 

Turn 17:

Combined fire from the band and the officers clears most of the Zeds only leaving a few knocked to the ground.

Turn 18:

Police officers take down remaining Zeds in the streets around the gas light grill – Dave, Lizard and the mediacrew enter the INFERNO, surprising two zombies – Nothing Dave’s Mac-10 doesn’t make short work of.

Turn 19:

Seth is rescued from the INFERNO, while Axel discovers where Seth left the keys for the tour bus – In the ignition. Under police escort DawnHammer, the manager and the newscrew leaves the area.


After the battle:

Jake regains consciousness, and is not infected.

Lizard improves his rep.
The news crew decides to join the band, as they see this to be the perfect angle on a zombie apocalypse story.

Wednesday, March 23, 2011

Storm Troopers - Airborne 101 & 102

"Storm Troopers are highly-trained shock troops forming the elite force that is a Storm Trooper regiment. They are trained to carry out special operations such as deep strike assaults, reconnaissance, and infiltration beyond enemy lines. Storm Troopers are the very best soldiers the Imperial Guard has to offer, being trained to the peak of human perfection, their combat skills are unmatched within the ranks of the Imperial Guard."
- Codex: Imperial Guard (5th Edition)

I just finished painting the 2nd squad of storm troopers, and since I now have two fully painted squads, I started wondering about how to play them to get full value for money (read: points). Looking at the special operations rule I see one thing that really makes them interesting from a tactical point of view and that is the flexibility the spec. ops rule gives them.

Until recently I’ve played the storm troopers as a 10 man unit with two meltas and a power weapon. They were to deep strike behind enemy amour or heavy infantry / power amour and take them out. It has however become evident to me that the drop-close-to-enemy-hammer-unit-strategy is suicide! Paying a lot of points for a fully tooled squad, that gets to fire for one round is not going to give return on investment.

So what I think I’ll do in the future is two 5 man squads with 2 special weapons (melta or plasma), who is to function as a rescue unit, sacrificing itself where the fighting gets too tough for the regular grunts in the army. While their ap3 guns are nice, storm troopers will, all in all, still be outgunned by regular infantry, so the gain I see is their tactical flexibility…
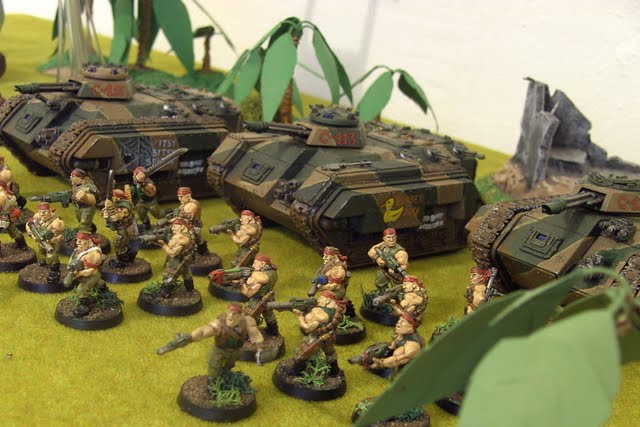
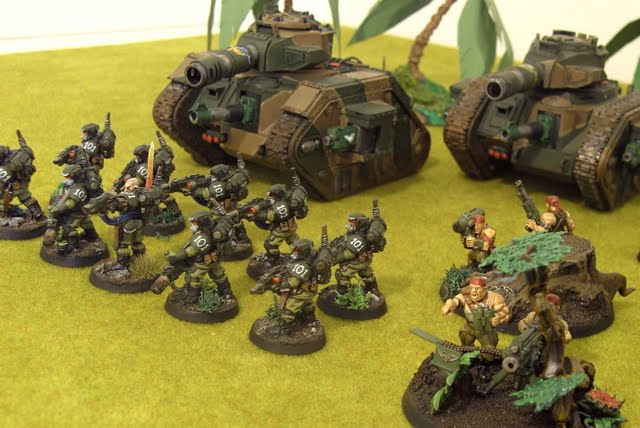
Here are my squads (I still have one unpainted, but 3 squads in one armylist might be overdoing it...):
Airborne 101:


Airborne 102:


/Nicolai aka Atoom

Thursday, March 17, 2011

Battle Report - DECOY!

After reading about Battle Chronicler on a forum a short while back, I simply had to try it out for battle reporting. The report below is the result of testing the Battle Chronicler software that can be downloaded for free on http://battlechronicler.com/ I’m not going to review the Battle Chronicler software here, but I’m sure that you’ll get my comments to the application in a later article.

The game played was one of the missions from the Emperor’s Chosen XI tournament pack. When I attended the tournament I didn’t get at chance to play the Decoy scenario as defender, so I had to give that a try…

DECOY!

Attacker’s Briefing: A transport vessel carrying important data has been shot down by the enemy. The stasis chests onboard the vessel are now scattered across a large area. Use your scanners to locate the right stasis chest and secure the important data before it falls into enemy hands!

Defender’s Briefing: Your forces have successfully shot down an enemy transport vessel. Suddenly, you find yourself under attack from an enemy raiding force searching for something in the vicinity of the wreckage. Judging by the rapid and forceful attack by the enemy, they must be seeking something important. Secure all the wreckage from the ship and repel the attackers!

Special Rules: Attacker Priority, Counters, Deep Strike, Infiltrate, Outflank & Reserves.

Set-Up:
1) Roll a dice. Winner gets to choose deployment zone.
2) Before both armies are deployed, the defender places three Counters. These counters must be placed 18” from the defender’s long board edge, and minimum 15” apart and 15” from the short table edge. Then the attacker secretly chooses which counter is the primary objective. Write this down on a piece of paper.
3) The attacker deploys his entire force first. Then the defender deploys his entire force.
4) The attacker gets the first turn.
Reserves: The defender may place one unit (max. 10 models, with up to 1 Independent Character attached, and a dedicated transport) in reserve. The attacker may not use reserves except for deep striking or

Game Length: The game lasts for six turns.
Line of Retreat: Towards own table edge.

Primary Mission Objective: The attacker must control the primary mission objective at the end of the game in order to win. If the attacker does not control the Counter the defender wins. The winner is awarded 20 BP’s and the loser is awarded 0 BP’s.

The Armies (1600points with S3 armyselection restrictions):

Space Marines (Attacker):
Chaplain (JP & Power Fist)
9 Assault marine squad (Power Fist)
10 Tactical marine squad split in combat squads (Rhino, Melta, Lascannon)
10 Tactical marin squad split in combat squads (Rhino, Melta, Lascannon)
5 Tactical squad split in combat squads (Heavy Bolter Razor Back)
Vindicator
Reserves:
5 Terminators (Chain Fist & Cyclone Launcher)
Venerable Dread in Drop pod
2 Landspeeders squadron (Multi Melta & Heavy Bolter)

Imperial Guard (defender):
Company Command Squad (Regimental Standard, 3 Sniper, Body guard)
Company Commander(Plasma Pistol & Power Weapon)

Infantry Platoon (41#, 405 pts)
5 Platoon Command Squad
10 Infantry Squad (Heavy Weapons Team - Lascannon)
3 Heavy Weapons Squad - Missile Launcher
3 Heavy Weapons Squad - Autocannon

2 Leman Russ Battle Tank in squadron (Lascannon & Heavy Bolter Sponsons)
10 Storm Trooper Squad (2 Meltagun & Power Weapon)
5 Ratling Squad
2 Scout Sentinel in squadron (Autocannon)
1 Manticore Rocket Launcher
Reserves:
Valkyrie Assault Carrier carrying 10 Veteran Squad (3 x Plasmagun & Plasmapistol)

Terrain setup
The downed transport vessel was located in the middle of the defender’s deployment zone with jungle and a wood just north of the crash site. The three objective counter was placed with the center one on the hull of the wreck and the others left and right of that (marked with a red *).


Deployment:
The attacking marines deployed with the vindicator in the middle and Razor Back, Rhino and one combat squad carrying a lascannon the left. On the right flank the other combat squad carrying a lascannon, the Chaplain and Assault marines and the last Rhino took up positions.
The IG set up a gunline with Compagny Command in the middle flanked by heavy weapons squads. Left flank was held by Ratlings, the Leman Russ squadron and the Manticore Rocket Launcher. The other flank was left to the platoon commander and his squads with lascannons and the scout sentinels on the far right. Infiltrating storm troopers takes up positions on the wreck to guard the middle objective.


Turn 1 - Marines:
The Razorback roars forward and takes up position behind a ruin on the left flank. On the right the combat squad in the Rhino and the chaplain and assault marines takes up position around the wood. As the shooting starts the storm troopers takes a beating, loosing half of the squad, but manages to keep their cool.


Turn 1 - IG:
The platoon commander moves forward on the right and takes up position on the hill on the right. The company commander orders the missile launchers to fire on the Vindicator, resulting a devastating hit on the tank. The Autocannon teams then scores a hit on the razorback on the left flank, immobilizing the tank. Following that all fire is directed to the chaplain and his assault marines, resulting in 6 fatalities in the squad.


Turn 2 - Marines:
At the start of the second turn both Terminators and the land speeder squadron arrives. The land speeders suffer a mishap and arrive in the woods instead of next to the IG tanks. The shooting that follows kills the remaining storm troopers and decimates the platoon command squad and the 3rd infantry squad. The Chaplain assaults the 1st infantry squad, killing them all in a sweeping advance. On the right flank the remaining assault marines assaults the scout sentinels, locking the units in a bitter fight.


Turn 2 - IG:
Just as the right flank looks like it is collapsing the Valkyrie and veterans arrive from reserve and engages the Terminators. In the shooting that follows their arrival the terminator squad is cut in half. The shooting ordered by the company commander inspires the heavy weapon teams to destroy both Rhinos. The Chaplain is killed by massed infantry fire and the shooting from the Leman Russ tanks makes a heavy impact on the land speeders – One is killed the other stunned. The Manticore’s storm eagle rockets makes short work of the marines who had just evacuated their Rhino.


Turn 3 - Marines:
Following the collapse of the right flank the terminators decide to take on the veterans, while the remaining squads fire at the guardsmen, hoping to break their morale. The Assault on the veterans cost almost half of the unit to die, but they manage to hold their ground.


Turn 3 – IG:
The Leman Russ squadron begins to move forward on the left objective. The Valkyrie leaves the veterans, as their fate is now in the power fists of the Terminators. The shooting that follows kills the last land speeder and a couple of marines. Then the terminators break the veterans, who are now below ½ strength and fleeing for their lives.


Turn 4 - Marines:
Falling from the sky a drop pod brings the venerable dread into action (we forgot the drop pod assault rule!). The dreadnaught is lined up perfectly for shooting his multi melta at the tanks, but only manages to score a shaking hit on one of the Leman Russ tanks. On the right flank the terminators kills the platoon commander and moves on towards the 3rd infantry squad. The remaining assault marine manages to finish off the sentinels and moves in on the Valkyrie.


Turn 4 - IG:
Acknowledging that right flank is collapsed the 3rd infantry squad embarks in the Valkyrie and is flown to safety close to the rightmost objective. The fleeing veterans manages to get their revenge, killing the terminators with massed plasma fire. The dreadnaught draws a lot of fire from the heavy weapons, but stands unscratched. Random fire takes out several marines, breaking the morale on one of the combat squads.


Turn 5 - Marines:
The venerable dread makes a move on the Leman Russ tanks, blowing one of them up. Lascannon fire destroys a weapon on the other.


Turn 5 - IG:
Having shot off all storm eagle rockets the Manticore rams the dreadnaught, but fails to do anything. The 3rd infantry squad disembarks and shoots the remaining assault marine. Massed fire on the dreadnaught fails to make an impact. The remaining Leman Russ destroys the remaining members of the combat squad north of its position.


Turn 6 - Marines:
The venerable dread tries to kill of the armour blocking its access to the left objective, but in vain – The marines are unable to repel the defenders!


Turn 6 - IG:
All able guns fire at the Dread – It suffers multiple penetrating and glancing hits, but as the smoke clears it stands…


Despite the casualties the Marines were very close to claiming the victory – Had it not been for the Manticore Ramming the dread, blocking him from claiming the objective.

/Nicolai aka Atoom

Tuesday, March 8, 2011

Taking the Speed Freaks for a spin...

Yesterday I had a couple of games with my orks. I tried out an alternative build, focussing on speed.

The list I played was 1600 point:
1 Battlewagon = (Deff Rolla, Red Paint Job, Kannon,  Big Shoota x3) carrying
Warboss ('Eavy Armour, Attack Squig, Bosspole, Cybork Body, Power Klaw, Shoota/Skorcha Kombi-weapon)
18 Choppa Boyz, and 1 Boyz Nob, ('Eavy Armour, Bosspole, Power Klaw)

1 Battlewagon = (Deff Rolla, Red Paint Job, Kannon,  Big Shoota x3) carrying
6 Nobz ('Eavy Armour, Waaagh! Banner, Power Klaw, Big Choppas and one combi scorcha)

1 Trukk (Boarding Plank, Red Paint Job) carrying
10 'Ard Boyz and 1 'Ard Boyz Nob (Bosspole, Power Klaw)

1 Looted Wagon (Armour Plates, Red Paint Job, Reinforced Ram) carrying
1 Big Mek (Eavy Armour, Bosspole, Cybork Body, Kustom Force Field, Burna)
8 Burna Boyz

5 Warbikers and 1 Biker Nob (Bosspole, Power Klaw)

3 Warbuggies (Twin Linked Rokkit Launcha)

The strategy:
The games were very quick, both in length and speed in movement. The two deff-rolling battlewagons safeguarded by the kustom force field carried by the big mek, was an insane combo. It wrecked havoc and allowed be to set the agenda for when and who to fight. Basically all passengers stayed in their vehicles until enemy transporters were disabled then charged out.

The warbikers and buggies served the purpose of stinging the enemy ordnance guns and other heavy weapons that posed a threat against the transporters. The strength of this list was it’s ability to set the agenda for fighting and the two deff rollers that steamrolled both dreadnaughts and defilers alike.


/Nicolai aka Atoom

Wednesday, February 23, 2011

Returning from a weekend of war…

I’m back from the tournament and what an experience! Cool people, and lots of w40k. I really has a blast, and even made 2 victories and some extremely close losses. I have added some pictures and notes from the tournament for those interrested

Game 1 Best of three vs. CSM Iron Warriors (IW) – WIN!
Mission Overview: Your forces and the enemy are attempting to capture and hold 3 important
objectives. The player that controls the most objectives at the end of the game wins the battle.


Notable Moments:
Turn 1: Managed to seize the initiative, and the shooting that followed that made a dent in the IW amour, destroying a Rhino, immobilizing a Predator, shaking a Basilisk and a Vindicator limiting the amount of enemy fire in turn 1.
Turn 2: IW holds all objectives and IW fire takes out majority of IG transporters.
Turn 3: Chaos sorcerer kills entire squad of Storm Troopers.
Turn 4: Arrival of the Veteran squad in the Valkyrie, allowing them to spray the enemy Terminators with plasma – Killing the entire unit. That marked the turn of the game, until then the IW had all objectives.
Turn 5: Random game length roll, game didn’t end, resulting in IG victory as the additional turn allowed me to seize two of the 3 objectives.

Game 2 Reversed Ambush vs. Eldar – LOSS!
Mission overview (defender): Your forces have been holed into a defensive position by an aggressive enemy war-host closing in for the kill! Luckily, you have managed to shroud your retreat by filling the air with thick, noxious fumes from the city’s old smoke vents. You must hold your ground until your reinforcements arrive to perform a surprise attack on your cocky enemies…

Notable Moments:
None – It was a slaughter, and unfortunately it was my guys who was on the receiving end!

Game 3 The Riggers vs. Blood Angels – LOSS!
Mission overview (defender): You are in control of a vital power plant but is under attack! Repel the intruders with massive firepower and surgical counterstrikes to defend the three small power stations from being rigged by enemy troops. Most importantly, you must not allow the main power converter to be destroyed by the enemy. Defend it at all costs.


Notable Moments:
Turn 5: Blood Angels assault terminators move in on the main objective, starting a huge close combat fight lasting for two rounds. Terminators  are swarmed by infantry including my company command squad. 4 terminators are killed 20+ guards loose their lives.
Turn 6: One terminator remains, company commander scores one wound with his power weapon, forcing a storm shield INV save (4+) – If it was failed then I would have won, unfortunately the save was made… In other words it all came down to one roll 50-50!

Game 4 Frontal Surge vs. Tau – WIN!
Mission overview: The location of the frontline may turn the tides for both engaging armies of this massive battle. Therefore it is crucial to your campaign that you hold your enemy at bay and surge forwards to win land. The objective of this mission is to control as many of the bands on the game board as possible. Each band represents a certain points value to each player.

Notable Moments:
None – The game started with a shootout, where Tau was quickly decimated, primarily due to unacceptable dice rolls from my opponent.


Game 5 Decoy vs. Speedy Orks – LOSS!
Mission overview (Attacker): A transport vessel carrying important data has been shot down by the enemy. The stasis chests onboard the vessel are now scattered across a large area. Use your scanners to locate the right stasis chest and secure the important data before it falls into enemy hands! The attacker must control the primary mission objective at the end of the game in order to win. If the attacker does not control the Counter the defender wins.

Notable Moments:
Turn 0: I was nominated attacker! This caught both me and my opponent flatfooted, but really made a difference for the game.
Turn 1: My shooting made a big impact on his line, destroying an deffrolla-battlewaggon, a truck and shaking some buggies.
Turn 3: Veterans in Valkyrie and storm troopers arrive from reserve and stops the orks from advancing.
Turn 5: I manage to screen the objective, and pick it up with an infantry squad.
Turn 6: The infantry squad carrying the objective runs through a wood – I assumed that victory is mine, but no! One truck remains speeding forward, unloading the orks inside. They have to make a 5” charge through the wood, to get to the squad carrying the objective. 2D6 for difficult terrain is rolled – He makes the charge & bye-bye objective.

/Nicolai aka Atoom

Saturday, February 19, 2011

Off to war! My 1st Tournament...

This weekend I'm off to war! I’ll be taking my Catachan IG army head to head with other players in a tournament. Despite having been in the hobby for more than 20 years I have never attended a tournament, so I'm very excited about the experience. The tournament I'm going to is the Emperor's Chosen XI, one of the bigger 40k events in Denmark - The ticket was a surprise from my wife!

Last couple of months have been spend on finalising the Catachan XI - But now they're all dressed up for some action :o). The pictures here were taken a couple of days back when I was doing a roll call to make sure that everybody was present and accounted for...

It is a 1600 point tournament with army selection restrictions (S3), and you can see the list I'm bringing below:

HQ:
Company Command Squad (5#, 85 pts)
  Company Commander (Power Weapon & Plasma Pistol)
  Company Command Squad (CC Weapon, Laspistol & Regimental Standard)

Troops:
Infantry Platoon (64#, 725 pts)
Platoon Command Squad
  Platoon Commander (Laspistol, Plasma Pistol)
  Platoon Command Squad (Lasgun & Heavy Weapons Team – Lascannon)
Infantry Squad 1:
  Sergeant (Laspistol & CC Weapon)
  Infantry Squad (Lasgun & , Heavy Weapons Team – Lascannon)
Infantry Squad 2:
  Sergeant (Laspistol & CC Weapon)
  Infantry Squad (Lasgun & , Heavy Weapons Team – Lascannon)
Infantry Squad 3:
  Sergeant (Laspistol & CC Weapon)
  Infantry Squad (Lasgun & Plasmagun)
  Chimera (Turret Multi-Laser, Heavy Bolter)
Infantry Squad 4:
  Sergeant (Laspistol & CC Weapon)
  Infantry Squad (Lasgun & Plasmagun)
  Chimera (Turret Multi-Laser, Heavy Bolter)
Infantry Squad 5:
  Sergeant (Laspistol & CC Weapon)
  Infantry Squad (Lasgun & Plasmagun)
  Chimera (Turret Multi-Laser, Heavy Bolter)
Heavy Weapons Squad 1:
  Heavy Weapons Teams (Lasgun & Heavy Bolter)
Heavy Weapons Squad 2:
  Heavy Weapons Teams (Lasgun & Missile Launcher)

Veteran Squad (10#, 125 pts)
   Veteran Squad @ 125 pts (Lasgun & Plasmagun x3)
   Veteran Sergeant (CC Weapon & Plasma Pistol)

Fast Attack:
Valkyrie Assault Carrier Squadron (1#, 100 pts)
  Valkyrie (Multilaser; Hellstrike Missiles x2)

Heavy Support:
Leman Russ Squadron (2#, 370 pts)
  2 Leman Russ Battle Tank (Battle Cannon; Lascannon; Heavy Bolter Sponsons)

Elite:
Storm Trooper Squad (10#, 195 pts)
   9 Storm Trooper Squad @ 195 pts (Hot-shot Lasgun &  Meltagun x2)
      1 Storm Trooper Sergeant (Hot-shot Laspistol & Power Weapon)

Now lets look at the army itself:


/Nicolai aka Atoom